A DIY Climbable Christmas tree for cats can be a fun way to keep them away from the real one.
But what should it look like? What equipment will you need? And how to build one for your cat?
We were inspired by amazing YouTubers and TikTokes and made small adjustments to their trees to help you find all the materials and tools needed for this creative endeavor.
We included easy, moderate, and Bob the builder ideas for your kitty.
Table of Contents
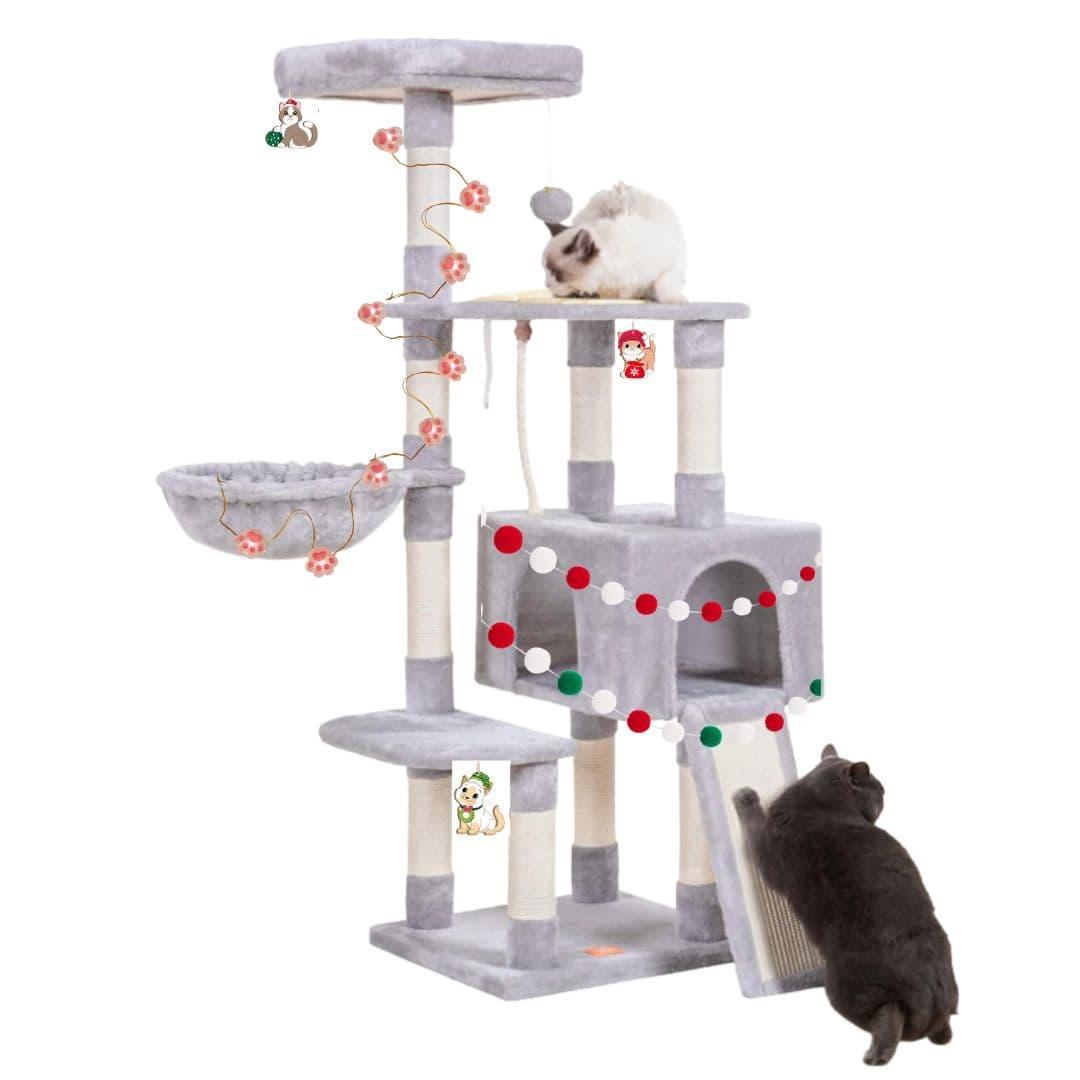
Climbable Heybly Cat Christmas Tree
Difficulty level: easy
One of the best ways to save time when making a DIY Climbable Christmas tree for cats is to use a premade cat tree and decorate it after assembly.
By already having all the necessary parts to assemble a cat tree, you will only need to find decorations and a few tools, such as safety pins, screws, or glue.
Here are all the necessary equipment and steps to turn a prebuilt cat tree into a magical Christmas tree for your kitty:
Equipment
- Heybly Cat Tree
- Cat Christmas ornaments
- Cat-friendly LED string lights (optional, take safety measures)
- Cord protector
- Tinsel or garland
- Double-Sided Velcro strips
- A cozy cat blanket or tree skirt
- Cat treats and cat Christmas toys (incentives)
Instructions
- Create a cozy resting area: Add a soft, festive blanket or tree skirt to the lower levels of the cat tree to create a cozy space for your cat to rest.
Alternatively, you can place it on the floor and assemble the cat tree.
- Place tinsel or garland: Place tinsel or garland on the cat tree for added festivity – cats often enjoy batting at these shiny decorations.
- Decorate with cat-friendly ornaments: Choose safe decorations for your cat, and avoid anything that could be swallowed or pose a choking hazard. Use double-sided Velcro strips to keep the ornaments safe and stable.
- Add cat-friendly lights (optional): Drape cat-friendly LED string lights around the cat tree for the extra festive touch. You can use eye hooks to cover the tree (or branches if you use them).
But remember to avoid placing them over the platforms (wooden boards), as these places should be resting places for your cat.
Pro tip: If you’re using lights, try to wrap the lightning wires in cord covers, as the electricity can still hurt your cat if they decide to nibble on the cords.
- Include cat toys: Hang cat-friendly Christmas-themed cat toys from the cat tree posts by gluing them or using double-sided Velcro strips. But you can drop the toys at the bottom of the tree if you notice your kitty trying to take the toys off the tree posts.
- Offer treats and encouragement: While you’re decorating, give your cat some treats and play with them to keep them engaged and safely introduce them to their personal Christmas tree.
- Supervise: If you used the suggested equipment and steps listed above, this DIY Climbable Christmas tree for cats should be safe for your kitty.
But note that some cats like to nibble on soft materials – so try to observe your kitty closely to ensure they don’t try to eat anything that could harm them.
Climbable Christmas Purr-idise
Difficulty level: Easy
Another easy and practical way to make a DIY cat Christmas tree for your furry friend is to decorate a premade cat ladder tree.
These cat trees are steady due to their ladder-type structure and come with multiple levels of resting floors – an excellent way to make a Christmas-themed resting place and playground in one!
Equipment:
- GDLF Modern Wood Cat Tree (in the shape of a ladder)
- Christmas tree skirt (optional)
- Artificial Christmas tree branch garland
- Christmas cat ornaments
- Cat-friendly LED string lights
- Cord protector
- Battery-operated Christmas lights
- Christmas ribbon bows
- Double-sided Velcro strips
- Invisible Scotch tape
- Catnip spray
- Short screws and screwdriver (any choice)
Steps:
- Set up the cat tree: First, find a desirable spot to assemble and place your cat ladder tree.
Pro tip: You can place a Christmas tree skirt underneath the ladder to make it extra cozy and add a nice decorative touch.
- Screw in the screws: Place enough screws to hang the cat ornaments. You should place them on each level of the ladder.
But remember to use them on the outer sides of the ladder – this will provide much more space for your cat(s) to play and rest from inside their Christmas tree.
- Hang the cat ornaments: Once the screws are in place, hang the Christmas cat ornaments.
- Wrap the cat tree in garlands: Stick the double-sided Velcro strips over the ladder (cat tree), once again, on the outer sides.
Once placed, use the sticky strips to cover your cat’s Christmas tree in garlands made of artificial branches – these will serve both as a ‘’toy’’ and a festive décor.
You can also stick the bows/ribbons like this; just ensure you have enough space if you’re using both.
- Place the Christmas lights: Now, you can use the artificial branches (garlands) to hold your lighting cords. Use the invisible tape to tape the Christmas lights around the branches – try to tape them tightly, but not too tight.
Pro tip: For extra safety, use a cord cover (protector) to wrap the Christmas lights before placing them.
- Use catnip spray (optional): To attract your cat to their climbable Christmas tree, you can use the catnip spray on the toys, garlands, and platform.
But note that although catnip is effective for most cats, it doesn’t work on every cat. If you use it, use it only in small amounts and not too often.
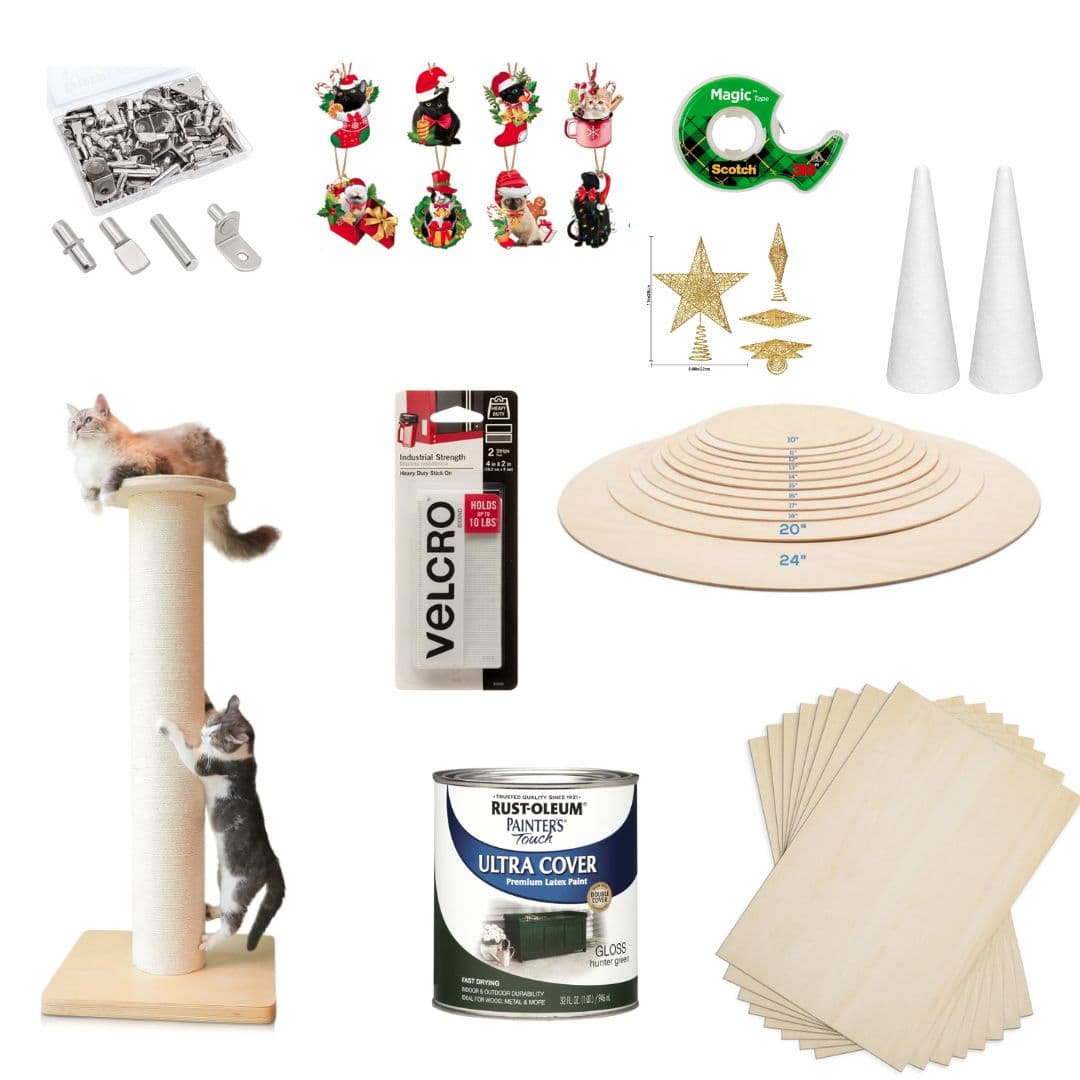
Tinsel Beauty Cat Christmas Tree
Difficulty level: moderate
Making a beautiful DIY Christmas tree for your kitty without spending much time and money is a bit tricky but not impossible. With the right idea and equipment, you can make it happen!
So let’s make a beautiful, climable Cat Christmas tree using only a few cheap items and decorations.
Equipment:
- Plastic trash can
- Natural bamboo sticks
- A Christmas tree star
- Sisal rope
- Tinsel
- Scotch tape
- Glue
- Safety pins
- Golden Gradient Gold Dot White Paper Pom Poms
- Screws and a screwdriver
Steps:
- Prepare the base: Find where you want to place your cat’s Christmas tree and place the trash can upside down.
- Secure the base: Use the screws and screwdriver to make sure the tree base stays fixed and stable in its place.
Pro tip: Try to secure it with at least four screws, each placed on a different side – this will allow your feline friend to climb on their Christmas tree without knocking it over.
- Build up the tree: Now it’s time to place all the wooden skewer sticks around the base, creating a cone-shaped structure. Then, use the tape to wrap all the sticks around the base to keep them stable.
Remember: Since we will use sisal rope and tinsel to wrap the tree, there shouldn’t be any spaces (holes) between the sticks.
Once the sticks are stable, bend their upper parts (tips) to the center by grouping them. Glue the tips of each stick to make a cone-shaped structure – an imitation of a Christmas tree.
- Place the star: Place the star on top to add a festive touch.
Pro tip: You can also glue the tips of the sticks and star together, making the upper part of the structure extra stable.
- Wrap it up: Now, you can wrap up all the sticks in sisal rope, and don’t forget to glue it. Keep wrapping and gluing, creating a spiral, until you reach the star on top. Ensure the ropes are tight around the structure and there are no loose spaces.
- Place the tinsel: Now that you have a steady structure, place the tinsel over the sisal rope, covering the entire Christmas tree. To make it steady, you can use glue again.
- Decorate: After placing the tinsel, you can start decorating by attaching the cat-friendly ornaments over the tree by using safety pins to pin them.
Now, you must introduce this miniature Christmas tree to your cats and distract them from your real one.
Although fake, this DIY cat Christmas tree is generally safe for cats. But there’s still a risk of them nibbling on the tinsel or other parts, so don’t forget to observe them while playing.
Catmas Tower: Green
Difficulty level: Bob the builder
One of the cat Christmas trees closest to a real one in resemblance is the primarily green tower for cats in the shape of a regular Christmas tree.
Let me show you how to make a DIY Climbabale Christmas tree for cats that will easily distract your furry friend(s) from your Christmas tree and make them feel loved and special.
Equipment:
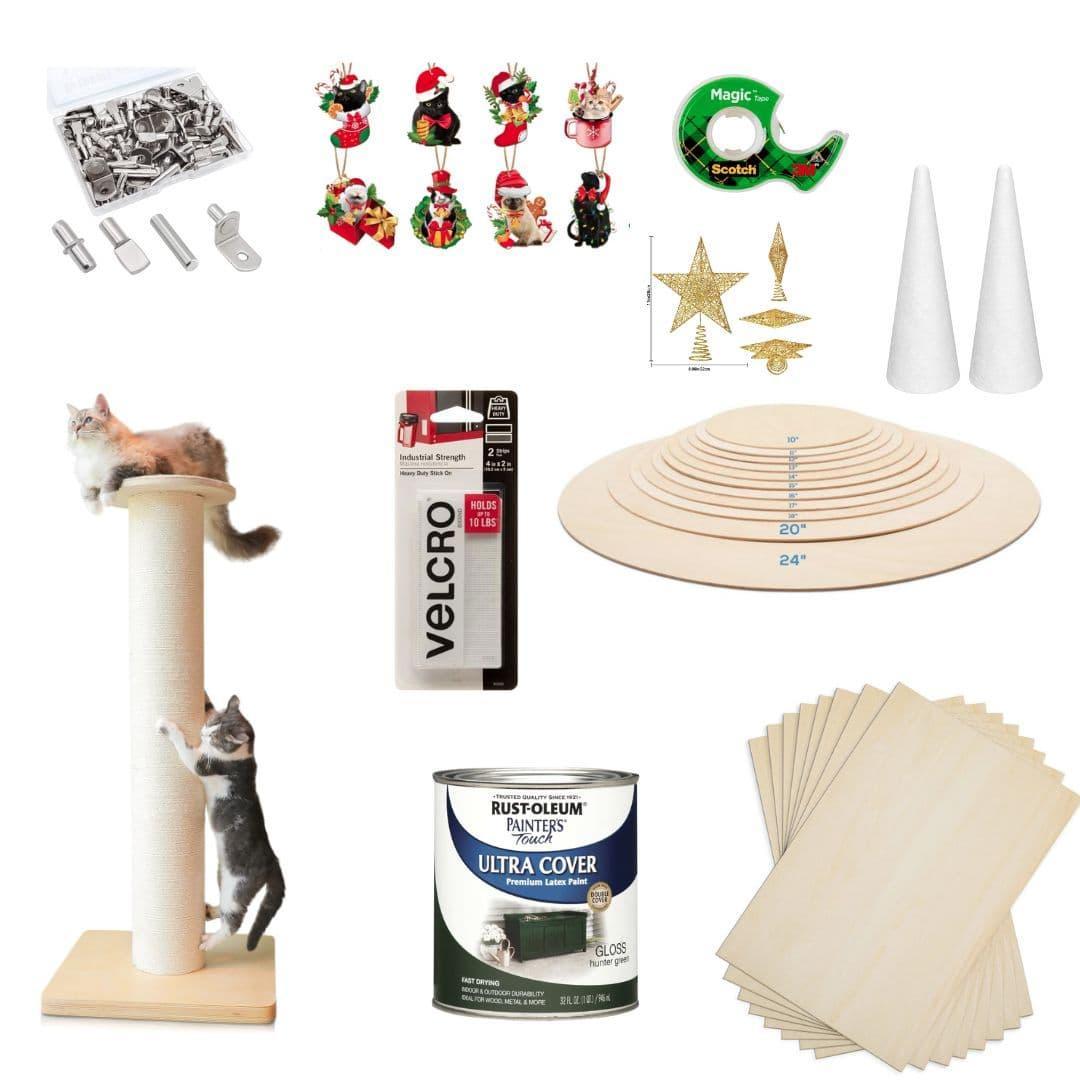
- A tall cat scratching post
- 12-inch wood circle
- 16-inch wood circle
- 20-inch wood circle
- Wood boards (unfinished, for crafting)
- Cat blanket
- Green paint (or any color you like)
- Metal holders (for wood circles)
- Screws and screwdriver
- Jigsaw (to cut circles)
- Scissors or scalpel blade (to cut blanket)
- Artificial Christmas tree branch garland (optional)
- Christmas cat ornaments
- Cat string lights (Battery Powered)
- Invisible Scotch tape
- Cord protector
- Double-sided Velcro strips (optional)
- Christmas tree foam cones (optional)
- Glitter gold hollow star (optional)
Instructions:
- Make the platforms: First, take a look at how thick is the tree base, more precisely, cat scratching post. Accordingly, use the jigsaw to make small holes in the center of each wood circle.
NOTE: If you never cut wooden objects before, I’d strongly advise you to seek help from a professional, friends, or family members with experience.
But if you still decide to do this by yourself, here’s a quick and easy-to-follow YouTube video to help you get a better understanding:4 Ways to Cut Circles in Wood // DIY Circle Cutting Jigs
- Paint the pieces: To bring a more festive touch to the cat Christmas tree, paint all the wooden objects in dark green.
Remember: Don’t forget to let the paint try before using wooden pieces, and keep them away from your pets until fully dried.
- Cover platforms with blanket: Once the wood circles are dry, cut the blanket with a scalpel or scissors to have three different-sized circles. Each one should cover one wooden circle.
Don’t forget to leave the blanket a bit longer so you can use the edges to hang the ornaments with safety pins when decorating.
- Place the post: Now, you should find a nice spot to place the cat scratching post.
- Attach the platforms and boards: Using metal holders, screws, and screwdriver, attach all the wood circles on the tree base.
Pro tip (optional): You don’t have to place the smallest wood circle on top for a more festive decoration. Instead, you can keep it a bit lower, glue the foam cone on top of the tree base, and place a Christmas star on it.
Also, cut the wooden boards in any quadrilateral shape that fits between each level of circles and connect them with metal holders.
- Place the branches: Now that the whole tree is ready, you can start decorating by gluing the artificial branches (garlands) on the edge of each woodboard and platform (wood circle).
- Put the lights: Use the invisible Scotch tape to drape the garlands with lightning strongs.
Pro tip: Don’t forget to protect the lightning cords with the cord protector, making the tree much safer for your kitty.
- Decorate: Once everything is set up, you can start hanging the cat ornaments and cat toys on the edges of each platform (wood circle).
Pro tip: You can use double-sided Velcro strips to stick them to the tree base or inner wood boards between each level.
Catmas Tree: Standard
Difficulty level: Bob the Builder
One of the most creative ideas for a climbable Cat Christmas tree would be to create a fully customizable one, meaning you can build and decorate it from scratch.
This will allow you to bring in more creativity and make a unique cat Christmas tree, a special Christmas gift for your kitty.
I’ve listed all the necessary materials/equipment and instructions you’ll need to make the whole process easier and quicker.
Materials/Equipment You’ll Need:
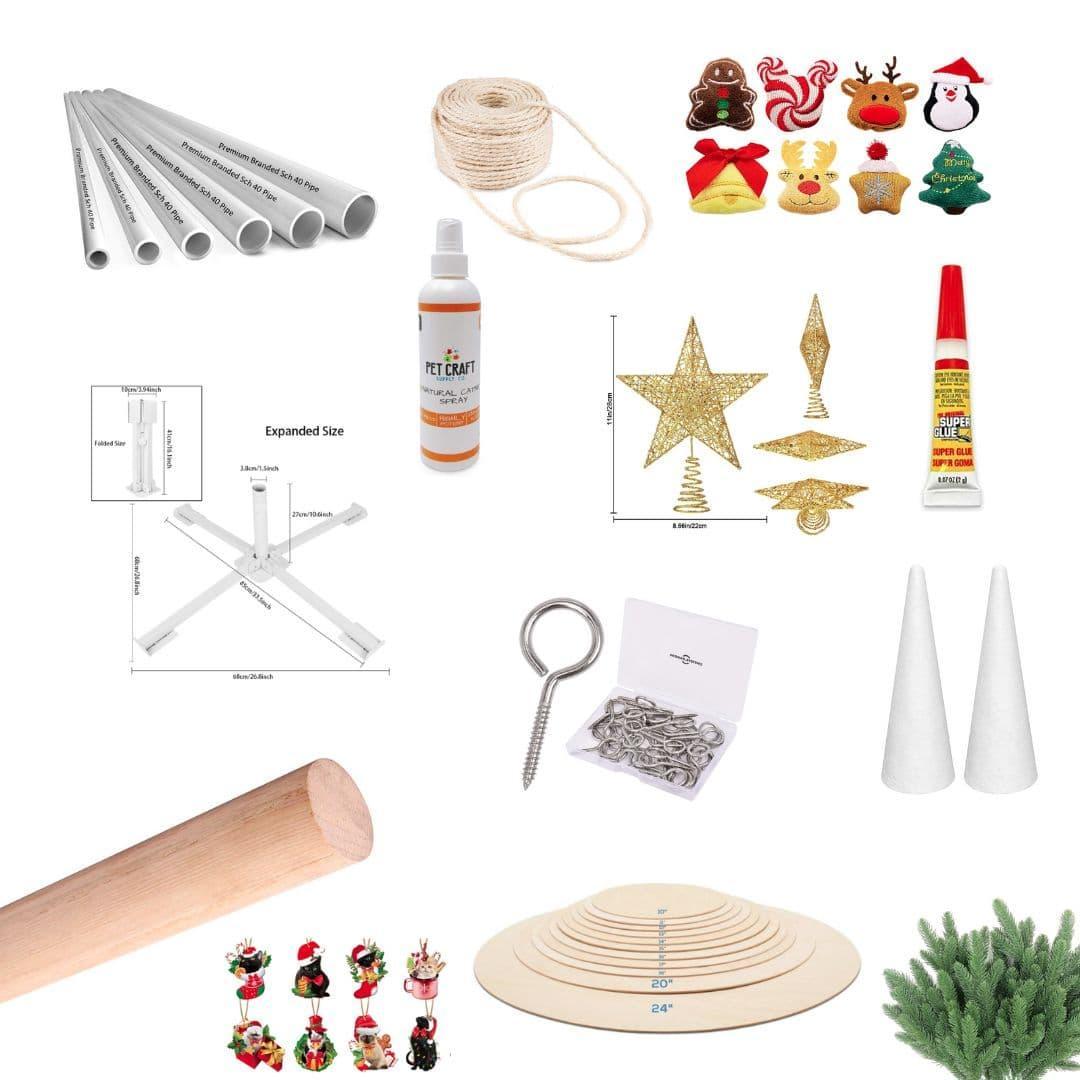
- A tall and sturdy wooden pole or PVC pipe (about 6 feet/180cm in height)
- A Christmas tree base stand (originally designed for umbrellas but works for artificial trees) Try to match pole or pipe size.
- Sisal rope (enough to cover the pole)
- Artificial Christmas tree branches or real tree branches (optional, your choice)
- Christmas tree foam cones
- Glitter gold hollow star
- Christmas cat ornaments
- Multiple circular wooden boards
- A cat bed for the top
- Metal holders (for boards)
- Eye hooks
- Screws and a screwdriver
- Glue or glue sticks if you have a glue gun (for branches and ornaments)
- Cat toys
- Tinsel (optional)
- Catnip spray (optional)
Instructions:
- Prepare the base: Securely attach the wooden base or base plate to the bottom of the wooden pole using screws.
Pro tip: Don’t forget to try to shake your DIY cat Christmas tree a bit and see how stable it is, to make sure it’s as safe as possible.
- Wrap the pole: Begin at the top and secure the sisal rope’s end with a knot.
Wrap the sisal rope tightly around the pole, adding a drop of hot glue here and there to keep it in place.
Continue wrapping until you reach the bottom, securing the end with another knot and trimming any excess rope.
- Attach metal holders: Screw the metal holders evenly around the pole at different heights, which will help you attach the wooden boards.
- Attach wooden boards: Now that metal holders are in desired spots, you use screws and a screwdriver to attach them to the tree base.
Be sure to leave one board and place it at the top of the pole – this can be a great place to keep the cat bed, though you can also place multiple on different heights of the cat tree.
Remember: Don’t forget to leave the tip of the tree post at the top uncovered so you can place a foam cone once the structure is complete – this will be a place for the Christmas star.
- Add branches (optional): Attach the artificial Christmas tree branches or real branches to the eye hooks and try to fasten them as tightly as possible.
Pro tips: Try to arrange them at different levels to create a tree-like structure. You can also use glue (or glue sticks) for extra stability.
- Finish the top: Once you have a complete structure, place the foam cone at the top. You can glue it on the tip of the tree base and cover it in tinsel.
Once you set it up and make it steady, place the Christmas tree star at the top of the foam cone.
- Decorate for kitty: Hang cat-friendly ornaments and toys from the branches. Optionally, you can include some decorative lights and tinsel too, but be sure to attach them properly.
- Make it comfy: Place a cozy cat bed at the top of the tree to give your kitty a comfortable spot to relax and survey their cat-dom. If you have more than one cat, you can also use multiple beds and place them on different platforms (wooden boards).
- Catnip spray (optional): If your cat enjoys catnip, you can lightly spray the tree to entice them to explore and play.
- Introduce your cat to the Christmas Tree: Encourage your cat to explore the tree by gently placing them on one of the lower branches.
Pro tip: Use treats and toys to entice them to climb and explore.
Christmas Tree And Cats: Q&A
What Kind of Christmas Tree Is Safe for Cats?
While artificial Christmas trees are a safer option than a real, traditional Christmas tree, DIY Climbable Christmas trees for cats and cat Christmas trees are the safest. A DIY cat Christmas tree will not only distract the cat from your real Christmas tree, but it will also be their personal Christmas tree – for relaxing and playing.
Is a Flocked Christmas Tree Safe For Cats?
No, flocking is made of synthetic dust, which is mildly toxic to cats. So if you use it on your DIY Cat Christmas tree, you’re cat may try to consume it and experience poisoning or intestinal blockage, depending on the amount.
Although serious health problems don’t happen often, it’s better to be safe than sorry.
My Senior Paws is a participant in the Amazon Services LLC Associates Program, an affiliate advertising program designed to provide a means for sites to earn advertising fees by advertising and linking to Amazon.com. We also participate in other affiliate programs which compensate us for referring traffic.